
Baths come in an assortment of shapes and sizes.
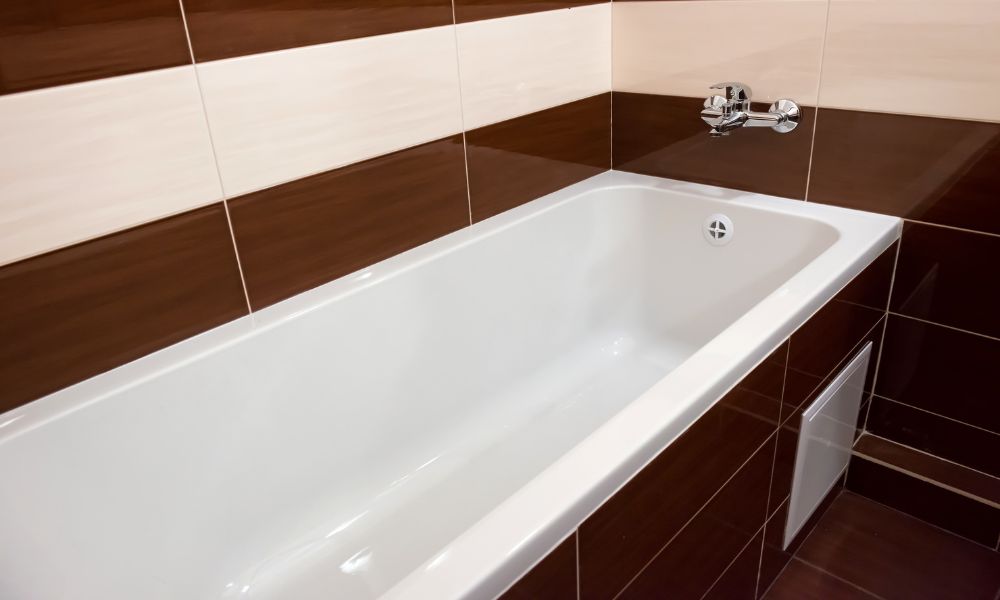
With space being a constraint in most modern homes, not all bathrooms are large enough to accommodate a standalone bath. As a result, you’ll need to install a bath against one or more walls.
When installed in this way, you’ll need to seal the gap between the bath and wall to safeguard against water seepage and damage. Thus, sealing will ensure a watertight finish around the bath.
Sealing a bath is a straightforward, do-it-yourself task. This time-saving and cost-effective DIY guide will help you understand how to seal a bath and apply the process step-by-step.
- Tools and Materials Needed to Seal a Bath
- How to Seal a Bath
- Most Asked Questions About Sealing a Bath
Navigate to any section of this post by clicking on the links above.
Tools and Materials Needed to Seal a Bath
You’ll need the following tools and materials for an immaculate, professional finish.
- Safety glasses and hand gloves: Safeguard yourself during the process.
- Silicone sealant remover tool: For scraping away old sealant.
- Silicone sealant remover: To remove the old sealant easily.
- Masking tape: To create a clean, straight line around the bath.
- Paper towels or clean rags: For cleaning surfaces.
- Cutting or utility knife: To cut the sealant nozzle.
- Silicone sealant: Choose a matching colour silicone sealant.
- Sealant gun: A heavy-duty sealant caulking gun to apply the sealant.
- Sealant smoothing tool: To smooth out the sealant.
How to Seal a Bath
Our detailed guide will cover the steps from preparation, applying the sealant, and adding the finishing touches, plus some additional tips.
STAGE 1: Preparation
Step 1: Remove Old Sealant
Before applying the new sealant, you must remove the old sealant completely. Since new silicone sealant doesn’t adhere to old sealant, it’s best to remove the slightest traces of the old sealant.
The new sealant will adhere much better to a clean, dry surface. So, in this first step, remove any existing sealant around the bath meticulously.
Scrape gently with a silicone sealant remover tool to avoid damaging the wall surface or tiles. To remove tough remnants of silicone, apply a thin layer of silicone sealant remover. Let it stand for a few hours before wiping it with a wet cloth.
Step 2: Clean the Area
Wipe the bath surface and surrounding wall with a clean, damp cloth to clear any remaining silicone residue. Next, wipe the area with a clean, dry towel to remove any dirt, dust, or debris.
Ensure the surfaces are dry before you proceed to the next step.
Step 3: Apply Masking Tape
Masking tape is also known as painter’s tape.
Stick masking tape along the edge of the bath, about 3mm to 4mm from the wall. Stick another strip of tape along the wall, leaving a matching gap from the edge of the bath.
The removable masking tape will help you create a neat, straight line and ensure the sealant doesn’t get on unwanted areas.
STAGE 2: Applying the Sealant
4. Cut the Sealant Nozzle
Cut the nozzle at a 45° angle, as it’s convenient to place the tip on the bath-wall edge. The opening should be slightly larger than the width of the gap you’re sealing.
Cutting the sealant nozzle correctly is vital, as an undersized opening can reduce the sealant outflow. As a result, it will take you much longer to complete the task. (You can quickly fix this by making the opening slightly larger.)
However, an oversized opening can cause a lot of sealant to get on the caulking tape.
5. Load the Sealant Gun
Squeeze the trigger of the sealant gun to pull the metal rod back. Insert the silicone sealant tube into the gun with its nozzle facing outwards and the base facing you.
Once the silicone tube is loaded, squeeze the trigger until the sealant reaches the nozzle tip.
6. Apply the Sealant
Start at one end and apply a uniform bead of the sealant. Maintain the position of the gun at the same angle and proceed along the entire length, filling the gap between the bath and the wall.
Move the gun at a steady pace, maintaining consistent pressure on the trigger.
7. Smooth Out the Sealant
Use a sealant smoothing tool or a gloved finger to smooth out the applied bead of silicone sealant. This will ensure better adhesion and a professional finish.
STAGE 3: Finishing Touches
8. Remove the Masking Tape
After smoothing the sealant, remove the masking tape carefully. Do it gently to prevent the tape from pulling on the uncured sealant and creating a ragged edge.
9. Allow the Sealant to Cure
A thin coat of silicone sealant will typically take 24 hours to fully cure. But it may take a few days if the sealant is thick.
Check the manufacturer’s instructions on the sealant tube for the recommended drying time. Avoid using the bath during this period.
10. Clean Up
Once the sealant is cured, wipe away any sealant residue with a damp cloth. Next, wipe the bath and the surrounding wall dry with a clean cloth.
Additional Tips
- If you make a mistake while applying the sealant, don’t panic. Simply wipe away the excess sealant with a damp cloth before it cures.
- For best results, open the bathroom windows when applying the sealant. If the bathroom does not have windows or is poorly ventilated, switch on the exhaust or extractor fan.
Most Asked Questions About Sealing a Bath
1. Why Should I Seal a Bath?
Sealing a bath creates a watertight seal, serving as a barrier against leaks. Sealing safeguards your bath against water damage, giving it a sleek look.
2. Should I Fill the Bath Before Sealing?
Since a bath will sink a little when it is filled with water, you must fill it before sealing it.
If you seal an empty bath, the silicone sealant could fracture as it expands when you fill it the first time after sealing.
For best results, it’s advisable to leave the water in the bath after sealing for as long as it takes the sealant to cure.
3. How Often Should You Seal Your Bath?
High-quality silicone sealant can easily last for 10 to 12 years. But maintenance is the key. The bath must be cleaned after every use, and the area surrounding the bath must be clean and mould-free.
Low-quality silicone sealant will degrade within a few years, and you may need to seal your bath once in 3 or 5 years.
4. How to Seal a Bath with a Large Gap?
You can use flexible caulking strips to seal a bath with a large gap.
Cut this self-adhesive tape using a utility knife to fit the entire length of the gap. Peel off the backing strip and press the tape into place.
5. Should I Hire a Professional?
If you’re not confident about your DIY skills, it’s best to play it safe.
Hiring a professional for sealing a bath will save you valuable time and money. It’s also difficult to match their excellent workmanship.
You can rest assured that they will seal your bath to perfection and ensure it’s watertight.
Shop Baths
At Bathroom City, we’ve got the best selection of baths – right from ultra-luxury to premium and down to affordable.
Your choices are truly vast – shower baths, corner baths, whirlpool Jacuzzi baths, freestanding baths, and more. So explore our bath collection today and upgrade your bathroom.
Other related articles you might also like to read: