
Fitting a bath can seem like a challenging task. However, with the right guidance, it can be a straightforward DIY project.
This guide will answer the question, “How do you install a bath?” by providing detailed instructions, cost considerations, and tips for fitting various types of baths in different bathroom settings.
- Preparing for Bath Installation
- Removing the Old Bath
- Positioning the New Bath
- Connecting the Plumbing
- Securing the Bath
- Sealing and Finishing Touches
- Things to Consider for Different Types of Baths
- Frequently Asked Questions (FAQs)
- Price and Installation Costs of Different Baths
Preparing for Bath Installation
Careful planning and consideration are indispensable for a successful bath installation. This section will cover the necessary preparation.
1. Measure Your Space
Accurate measurements will ensure optimal functionality and bath accessibility.
The primary tool you’ll need is a retractable tape measure, as it will allow you to measure the essential dimensions with ease.
Write down your measurements in an old-fashioned notepad. You could also record them on a digital device.
2. Water Supply and Waste Pipe Alignment
In this step, the focus is on ensuring that the plumbing and drainage connections are in perfect alignment.
In most cases, the water supply pipes can be redesigned – shortened or extended – to match the taps on the new bath.
However, getting the waste pipe alignment right isn’t easy. Some models of older baths had a side outlet, whereas new baths have a drain at the bottom.
If the current drain pipe does not align with the design of the new bath, then hire a plumber to reconfigure the waste pipe system.
3. Replacement or First-Time Install
In the case of bath replacement, clean the space after removing the old bath and inspect the bath subfloor for any damage. (This is explained in greater detail in the next step.)
For a first-time install, check if the subfloor is level. Ensure that it can easily support the weight of the bath when filled with water.
4. Select the Right Bath
Selecting the right bath involves balancing the existing décor/style, preferences of your family members, functionality, and plumbing and drainage considerations. You can choose from the following 5 types of baths:
Shower Baths
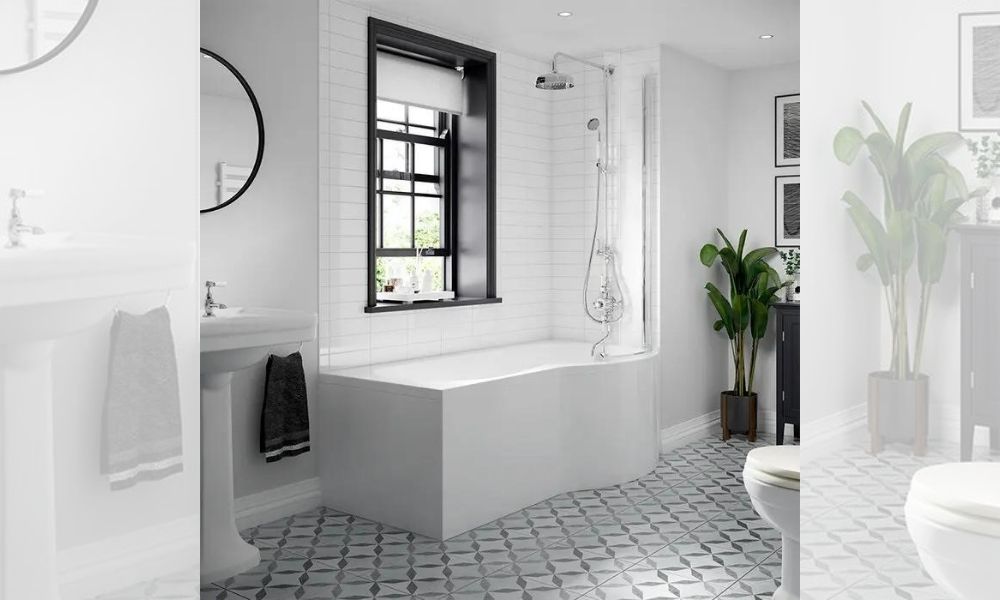
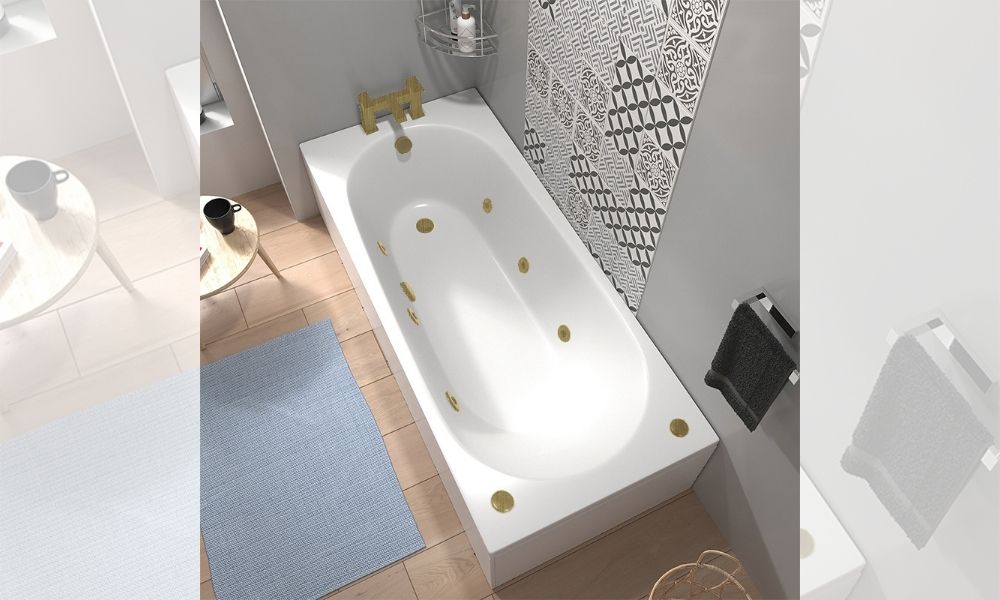
A shower bath presents you with a space-saving opportunity, a handy feature if your bathroom is small. In case your bathroom is ultra-small, the 1500 X 1000 shower bath would be the perfect fit.
Corner Baths
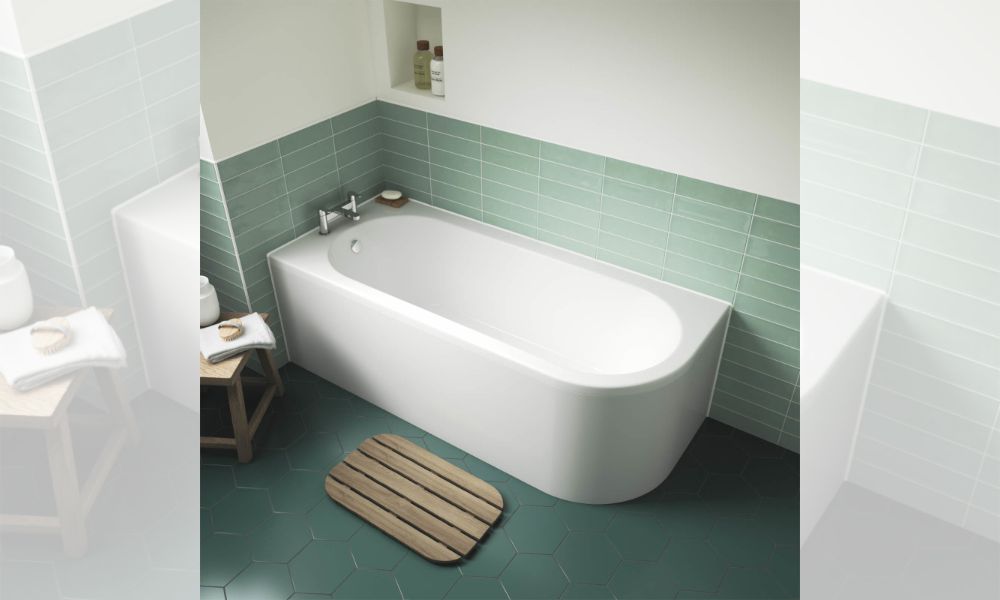
Our wide variety of stunning corner baths gives you plenty of freedom. You can choose a design that suits your space, regardless of the bathroom style.
Steel Baths
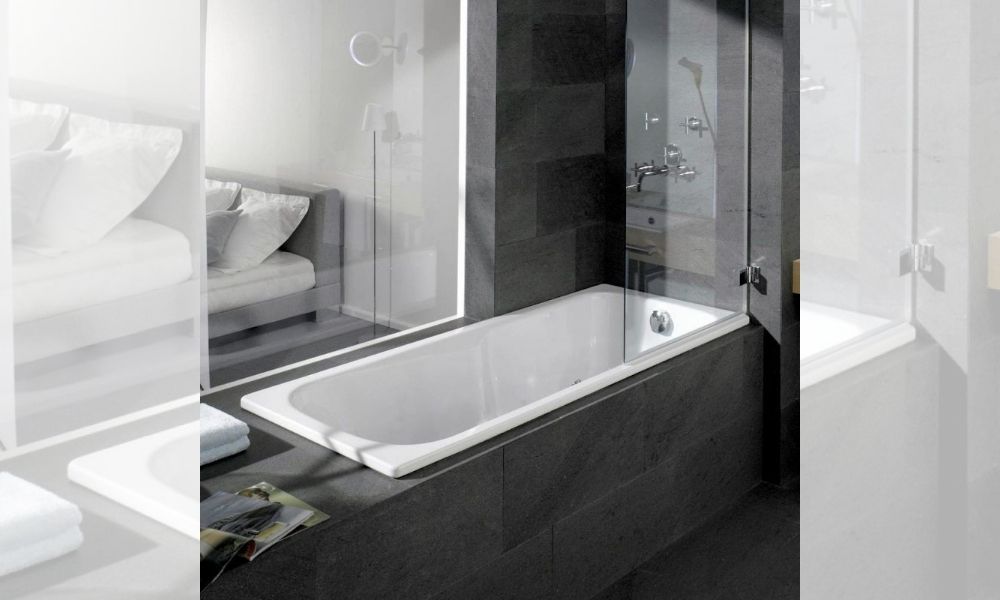
A steel bath is the perfect choice if you’re looking for a bath that’s incredibly durable and retains heat for a long time. The thick enamel coating ensures that your bath remains scratch and stain-resistant.
(Note: Since a steel bath is heavy, you’ll need to engage the services of a professional remodelling team for the installation of this bath.)
Freestanding Baths
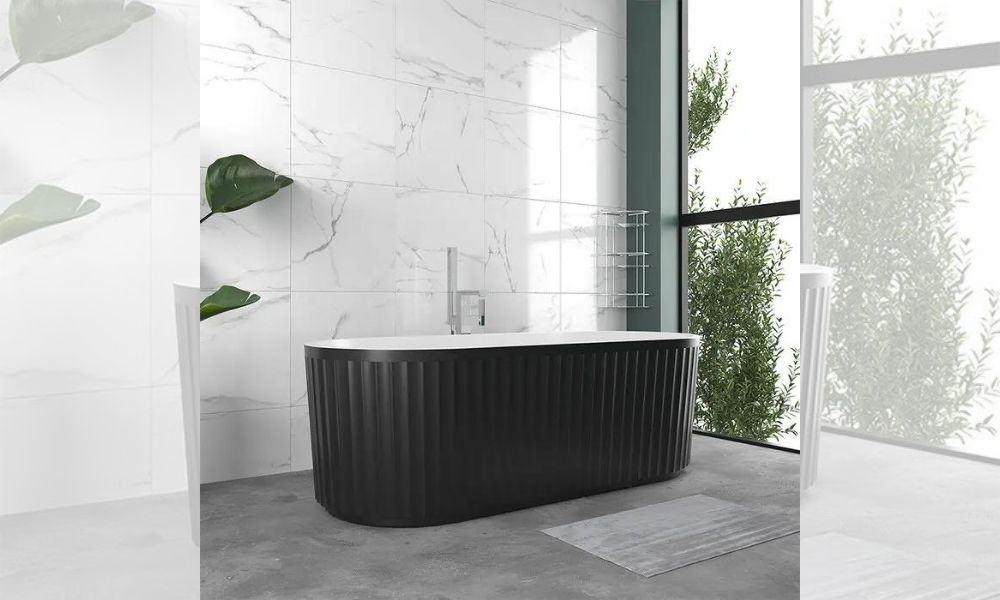
A freestanding bath offers a luxurious, traditional appeal, making it the focal point of your bathroom. Hence, you need to first determine the right place for it.
Whirlpool Baths
A whirlpool bath will fit the aesthetics of a contemporary bathroom to perfection.
The state-of-the-art hydro massage jets, quiet motors, and feather-touch control panel will give your bathroom an elegant look.
5. Tools and Materials
For a quick and efficient bath installation process, keep the following tools and materials at your disposal:
- Safety goggles
- Protective gloves
- Pencil
- Retractable measuring tape
- Clean cloth
- Spirit level
- Putty knife
- Power drill
- Drill bits
- Hammer
- Plumber’s tape
- Flat and cross screwdriver
- Adjustable wrench
- Pipe wrench
- Tester
- Hole saw
- Silicone sealant
- Silicone gun
- Sealant applicator
- Masking tape
Step-by-Step Guide to Fitting a Bath
Step 1: Removing the Old Bath
Turn off the water supply. If the old bath has front and side panels, remove them first.
Next, turn on the bath taps and drain the water in the pipes. Dismantle the pipes under the bath and disconnect the drain pipes.
Using a putty knife, cut through the sealant between the bath and the wall. Also, undo any fixings that secure the bath to the wall.
Check whether the bath can be moved. With another person's help, carefully lift the bath out of its place. Some baths are quite heavy for even two people to lift.
Clean the surroundings and ensure the whole area is dry and mould-free.
Step 2: Positioning the New Bath
Level the Bath
Read the manufacturer’s instructions manual and assemble the bath legs. Next, place the legs under the bath and adjust their height.
If the new bath has bath panels, then the bath height should match the panels' height. Hold up the bath panel against the bath and check the fit.
Once you are satisfied with the position of the legs and the height of the bath, secure the legs to the bath with the fixings provided.
Double-check the level using a spirit level, and adjust the height of the legs if necessary.
Mark the Position
Now that the new bath is in its final position, mark a line on the wall with a pencil. This line will indicate the top edge of the bath.
Note the distance between this line and the bathroom floor. Ensure this reading matches the height of the bath panel.
Also, mark all the fixing points on the wall and drill holes for the mounting brackets. Before you make the plumbing connections, attach the mounting brackets to the wall.
Step 3: Connecting the Plumbing
In this step, you will connect the bath waste, overflow, and bath taps.
Follow the manufacturer’s instructions closely and connect the bath taps and overflow and waste pipes. You’ll need an adjustable wrench and pipe wrench for this.
You can connect the bath taps by fitting them onto the bath and fastening them with bolts. Ensure that the taps are in the centre and at the right location.
Similarly, you can fit the waste pipe into the opening at the bottom of the bath and attach the overflow pipe to the overflow opening.
Use plumber’s tape around joints to prevent leaks and avoid over-tightening any pipes.
Step 4: Securing the Bath
Bath legs typically have holes. So, you can secure the legs to the floor with the screws provided. Ensure the legs are strongly attached, and the new bath is stable.
Freestanding baths don’t need any attachment, as they are heavy. For other types of baths, you can use anchors or brackets to fasten the bath securely at its load-bearing structural points.
Double-check to ensure the bath is secure and stays in place during use.
Step 5: Sealing and Finishing Touches
This is the final step before your new bath is ready for use.
Apply Sealant
Sealing a bath may seem like a difficult task. But with masking tape, silicone gun, silicone sealant, and sealant applicator, sealing a bath is pretty straightforward.
Remember to fill the bath with water. The additional weight will cause the bath to sink slightly. Sealing an empty bath is risky, as the sealant might crack under pressure later.
Paste a strip of masking tape above and below the sealing area. The gap between the taped surfaces is where you direct the nozzle of the silicone gun and shoot the silicone sealant.
A steady hand will ensure even coverage and prevent any sealant from reaching unwanted areas. After you apply the sealant, smooth it down with a sealant applicator or your finger. Apply the sealant around the bath edges and drain fittings, as well.
Remove the masking tape gently, and wipe off excess sealant with a damp cloth.
Finishing Touches

The type of bath you buy will determine whether you need bath panels or not.
If your bath has panels, check the manufacturer’s instructions before installing the bath panels.
Slot the front bath panel into place, and screw it to the bath. Similarly, if there is a side panel/s, slot it into place and screw it to the bath.
If you have bought other accessories along with a bath, such as a bath shower mixer tap, you can install that as well to complete the look.
Things to Consider for Different Types of Baths
Need a refresher on the types of baths available for your home? Our detailed guide on the types of baths is a great resource to help you understand your options and make the best choice.
1. Fitting a Freestanding Bath
For positioning and securing a freestanding bath, you’ll need to prepare the plumbing connections and the base of the bath.
Installation can be pretty quick if the bathroom floor is flat and sturdy. Remember, the floor needs to support the weight of the bath + the water when it’s filled + your weight.
2. Fitting a Whirlpool/Jacuzzi Bath
When it comes to bath installation, installing a whirlpool bath is the most challenging project. That’s because only a qualified electrician can make the electrical connections within this bath.
In addition, setting the direction of the hydro jets is complex. Therefore, this isn’t a DIY project and even a professional team will be stretched to complete the installation within a day.
Looking to understand whirlpool baths better? Our Comprehensive Guide To Whirlpool Baths has all the answers you need.
3. Fitting a Shower Bath
You can install the shower unit in a shower bath on your own. You only need minimal DIY skills.
First, hold the shower unit over the shower bath and mark the point on the wall where you want to install it. Then, use a masonry bit to drill holes in the wall.
Connect the existing piping to the new shower unit. Secure the unit to the wall using wall plugs and screws. Fix the shower hose and unit cover. Test the connections.
To seal the bath and ensure proper drainage, follow the instructions in the Sealing and Finishing Touches section above.
When Should You Call a Professional?
Installing a bath can sometimes go beyond your capabilities. At such times, you might require professional help.
You must understand your limits. A complex task, such as installing a whirlpool bath or the potential for expensive damage if done incorrectly, is the time to call a professional contractor.
Complex plumbing rerouting
Complex plumbing rerouting is more than just connecting pipes. It involves ensuring proper slope and compliance with building codes. Only a professional plumber can complete these tasks flawlessly.
Leaks in inaccessible areas
When you suspect a leak behind a wall or under the floor, locating the source of the leak can be tricky. In any case, a leak in an inaccessible area definitely requires professional intervention.
Bathroom structural changes
Significant structure work, such as altering load-bearing walls, updating electrical fixtures, or moving the main plumbing points, will need professional assistance.
Frequently Asked Questions (FAQs)
What Do You Put Under a Bathtub for Support?
Plastic shims are a cost-effective solution that provides adequate support.
Closed-cell spray foam, a more expensive option, offers both support and insulation. Alternatively, treated floor joists cut to the right size and secured with foam can also be used.
Can You Put a New Tub Over an Old Tub?
While technically possible, it isn’t a long-term solution. Removing the old bath and installing a new one is the best option.
A bathtub liner can be installed over an existing bathtub, but it may require plumbing modifications.
Do You Screw a Bathtub to the Wall?
Screwing a bathtub to the wall is a common practice to secure it to the wall. A combination of brackets, screws, and sealant is used.
Do You Tile Before Fitting a Bath?
The major advantage of tiling before fitting a bath is it’s easier to install tiles without the bath in the way.
Since tiles prevent water from reaching the floor or walls, installing the tiles first can provide a better seal against water damage.
Tiling before fitting a bath will also provide a more seamless and professional appearance.
How Long Should It Take to Fit a Bath?
If the dimensions of your bathroom are favourable, the bath installation can be completed within 3 to 5 hours.
However, if your bathroom is small, working within a compact space can be challenging, and the progress may be slow. The same work may take 6 to 8 hours to complete.
In addition, any unforeseen complication, such as rusted or damaged piping is another issue. Replacement of pipes is time-consuming and will also raise the installation cost.
Also, if you need to remove existing fixtures to fit the new bath, the work can be time-intensive, and the installation cost will increase.
How Much Does It Cost to Install a Bath?
While it’s possible to get a quick evaluation of estimated costs when you’re planning a bath installation, the end figure can vary. Expert bath installers may quote anywhere between £200 to £500, depending on the bath type and the intricacy of the task at hand.
If the job involves making some simple plumbing connections, the bath installation will cost you less. However, installing a whirlpool bath is more complex as it comes with multiple jet systems and electrical accessories. The installation can take a whole day or even more and will cost you quite a bit.
Can I Turn My Shower into a Bathtub?
A shower bath presents you with the best of both worlds – a quick shower and a long, drawn-out bath. If the dimensions of your bathroom allow you to install this fixture, you can do so with confidence and ease.
Does a Bathtub Add Value to Property?
Yes, it certainly does.
Although the days of an extended full-body soak every day are long gone by, a bathtub continues to remain a symbolic bathroom statement piece. Without a bath, your house will have a limited pool of potential buyers when you decide to sell it.
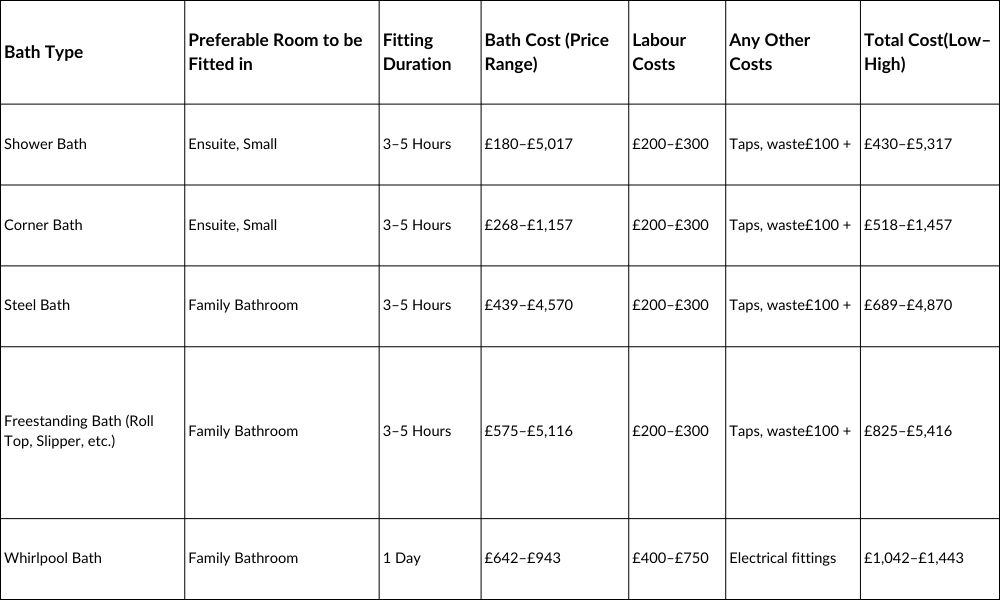
Price and Installation Costs of Different Baths
Many factors affect the overall bath installation cost. The primary ones among them are the price of the bath as well as the installation cost. These two components are higher for freestanding baths, steel baths, and whirlpool baths compared to shower baths and corner baths.
The labour costs and job times presented in the table below are only rough guidelines. The actual cost may vary depending on your location and whether you want to fit a new bath or you want to make changes to your existing bathroom.
Shop Baths
At Bathroom City, you will find baths from several manufacturers – the range is simply terrific. We recommend our in-house custom-built baths that are elegant and durable.