
The primary function of a radiator valve is to control the heat output of the radiator.
While this mechanical component is sturdy and reliable, it does have a lifespan. Age and frequent use are the major reasons that can lead to wear and tear in a radiator valve, resulting in leaks or even total failure.
In such an instance, replacing the radiator valve will suffice. You certainly don’t need to buy a new radiator.
The goal of this detailed DIY guide is to teach you how to replace a radiator valve without professional help.
- Why Is Replacing a Faulty Radiator Valve Important?
- Signs You Need to Replace Your Radiator Valve
- Tools and Materials You’ll Need for Replacing a Radiator Valve
- How to Replace a Radiator Valve Without Draining the System
- Testing and Finishing Up
- Common Mistakes to Avoid When Replacing Radiator Valves
- Frequently Asked Questions (FAQs)
Navigate to any section of this post by clicking on the links above.
Why Is Replacing a Faulty Radiator Valve Important?
A faulty radiator valve can cause issues like water/steam leaks that can damage the bathroom floor, inconsistent heating, increased energy costs, and even radiator failure.
So, replacing a faulty radiator valve can address corrosion and wear, check further damage, improve heating efficiency, and prevent energy waste.
Signs You Need to Replace Your Radiator Valve
A radiator valve can go on for years without needing maintenance or replacement. But eventually, there will come a time when it will wear out and not function efficiently.
Ignoring a faulty valve can cause bigger issues, such as system pressure loss, strange noises, and high energy bills.
Common Symptoms:
- Leaks around the valve: Any leak around the valve is a clear sign that the valve is worn out. A sealant can be used to plug the leak, but it’s a temporary fix. So, it’s better to replace the valve to avoid bigger issues.
- Radiator not heating properly: If the radiator doesn’t heat up properly or takes an unduly long time to heat up, it’s a sign of a faulty valve. A simple valve replacement will resolve the issue.
- Difficulty turning the valve: A stuck or jammed valve is a strong indicator of a problem. Regardless of the cause – rust, corrosion, or worn-out mechanism – it’s time for radiator valve replacement.
Tools and Materials You’ll Need for Replacing a Radiator Valve
The following are the tools and materials you’ll need for replacing a radiator valve:
- Screwdriver (Phillips or flathead, depending on the radiator type)
- Adjustable spanner
- Pair of grips
- Pressure gauge
- Radiator sealant
- Rags or an old towel
- A bucket
- Replacement radiator valve
- PTFE (polytetrafluoroethylene) tape
How to Replace a Radiator Valve Without Draining the System
Replacing a radiator valve without draining the central heating system can save time and minimise mess. The following is the step-by-step process of this method.
Step 1: Turn off the water supply and heating
Start by switching off your central heating system and allowing the radiator to cool completely.
Use a pair of pliers or an adjustable spanner to turn the spindle on the return valve clockwise. Continue turning until it won’t turn any further. This will prevent water from entering the radiator from this side.
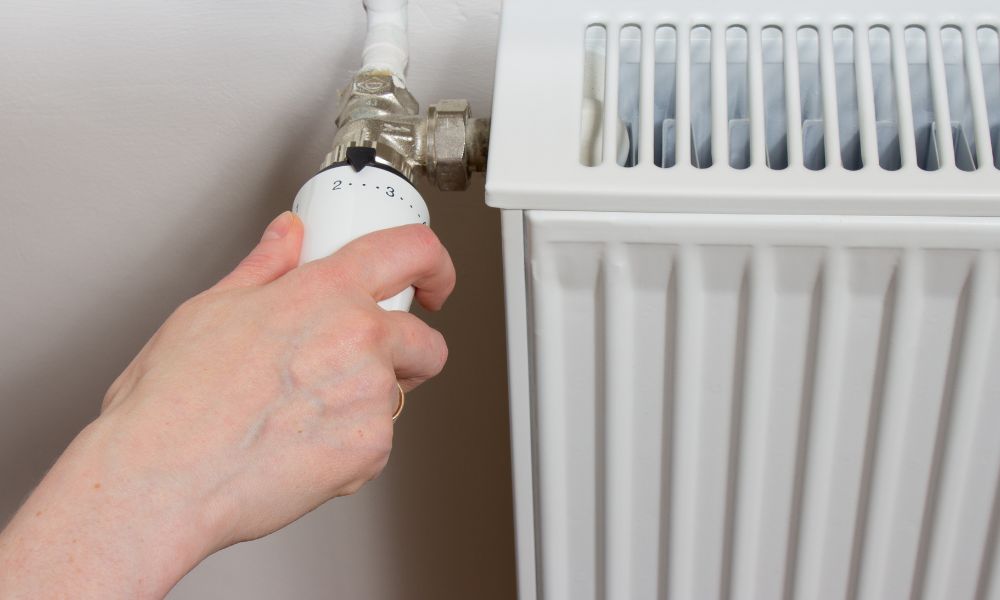
Next, turn the valve on the other side of the radiator clockwise until it doesn’t turn any more. If it’s a thermostatic valve, turn it until the dial shows zero.
Turn the heating off and wait until the radiator is completely cool.
Step 2: Safeguard the floor
Cover the bathroom floor under the valves with old towels and a bucket to catch any excess water.
Step 3: Prepare the New Radiator Valves
On the flow pipe, prepare the on/off radiator valve.
If you are switching an old thermostatic valve for a new one, remove the thermostatic head off both the valves. This can be turned and removed by hand.
Smear the thread of the new valve that joins to the radiator with PTFE tape around 5 to 7 times to prevent any leaks.
Step 4: Release the stored pressure
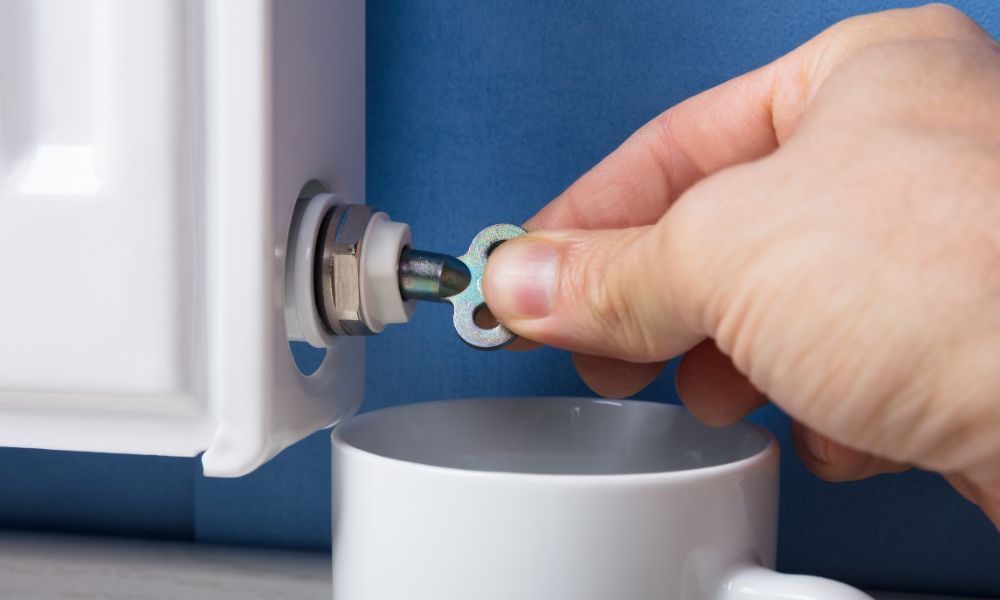
Open the radiator bleed valve using the radiator bleed key. This action will release any stored pressure. Once the hissing stops and no more air or water escapes, close the bleed valve.
Step 5: Open the old radiator valve on the flow pipe
Loosen the top nut using a spanner. This action will help you open the old radiator valve.
Next, use the grips to hold the body of the radiator valve. Make an upwards turn using an adjustable spanner. Water will start flowing out once you unscrew the cap nut completely.
Step 6: Release the pressure and drain the radiator
Once the old radiator is open, you can feel the air inside escape. Water will also flow out of the radiator. Place a bucket on the floor to catch the water that flows out.
Depending on the size of the radiator, it could take 5–10 minutes for the water to drain completely.
Step 7: Remove the old radiator valve
Once the water has drained, unscrew the nut and pull out the valve on one side.
Next, turn the nut on the bottom that connects to the pipework anticlockwise and remove the valve.
Step 8: Attach the new radiator valve
Align the new radiator valve with the adapter by holding its body with the grips. Use the spanner to tighten the cap nut. Next, tighten the other cap nut that holds the radiator valve to the pipe.
Take care not to over-tighten, as it might damage the thread. If the new radiator valve is a thermostatic valve, screw the valve head onto the valve. This action can be completed by hand.
Testing and Finishing Up
How to bleed the radiator properly after replacing a valve?
Open the radiator bleed valve using the radiator bleed key. Prepare to catch water by placing a bucket under the bleed valve.
Wait for the water. You’ll see a steady stream emerging. This is an indication that air has been completely released.
Once the water flow is steady, close the valve.
Check for leaks and ensure correct pressure in the boiler system
Inspect for leaks around the new radiator valve and pipe connections.
Next, using a pressure gauge, verify whether the boiler pressure reading is within the normal range (1–1.5 bars).
In case the pressure is high, then bleed the radiator to release the extra pressure. And if it’s low, use the filling loop valves to refill the system.
Final tips for restoring full heating function after radiator valve replacement
After refilling the system, turn on the heating. If you notice any drips, tighten the nuts.
Test the radiator’s performance by checking if it’s heating normally.
Common Mistakes to Avoid When Replacing Radiator Valves
- Over-tightening connections: Take care not to over-tighten the nuts, as it can damage the threads or the valve.
- Forgetting to isolate both valve ends: Isolating both valve ends will prevent water spillage and ensure proper valve replacement.
- Not bleeding the radiator afterwards: Not bleeding the radiator after valve replacement can result in airlocks, inconsistent heating, and poor radiator performance.
- Not checking the system pressure post-installation: Not checking the system pressure post-installation could result in leaks and other issues.
Frequently Asked Questions (FAQs)
Do I Need a Plumber to Replace a Radiator Valve?
No.
A like-for-like radiator valve replacement is a simple DIY project. However, the installation of a Thermostatic radiator valve (TRV) is more complex, as it’s designed to regulate temperature.
How Long Does It Take to Replace a Radiator Valve?
Replacing a radiator valve can take anywhere between one and two hours.
How Much Does It Cost to Replace a Radiator Valve in the UK?
The type of radiator valve and the complexity of replacement are the main cost considerations. On average, the cost of replacing a radiator valve in the UK will range between £50 and £200.
Can I Replace a Thermostatic Valve with a Manual One (And Vice Versa)?
As long as the thread size and pipe diameter are compatible, replacing a thermostatic valve with a manual one (and vice versa) is definitely possible.
Should I Upgrade to a Thermostatic Radiator Valve (TRV)?
The key advantage of a TRV is that it can adjust the flow of hot water automatically, depending on the temperature inside your bathroom. This feature minimises energy waste, reducing your heating costs.
A small upgrade that promises a huge impact is the Satin Nickel Chelsea Angled Thermostatic Radiator Valves. This resilient and durable accessory is made from the finest materials.
In addition, this sturdy component comes with a 5-year guarantee and a 20-year manufacturing warranty.
Shop Radiator Valves
Bathroom City’s vast range of radiator valves provides superior heating control. The precise temperature settings and stylish finish of this accessory will transform the functionality of your bathroom.
Other related articles you might also like to read: